


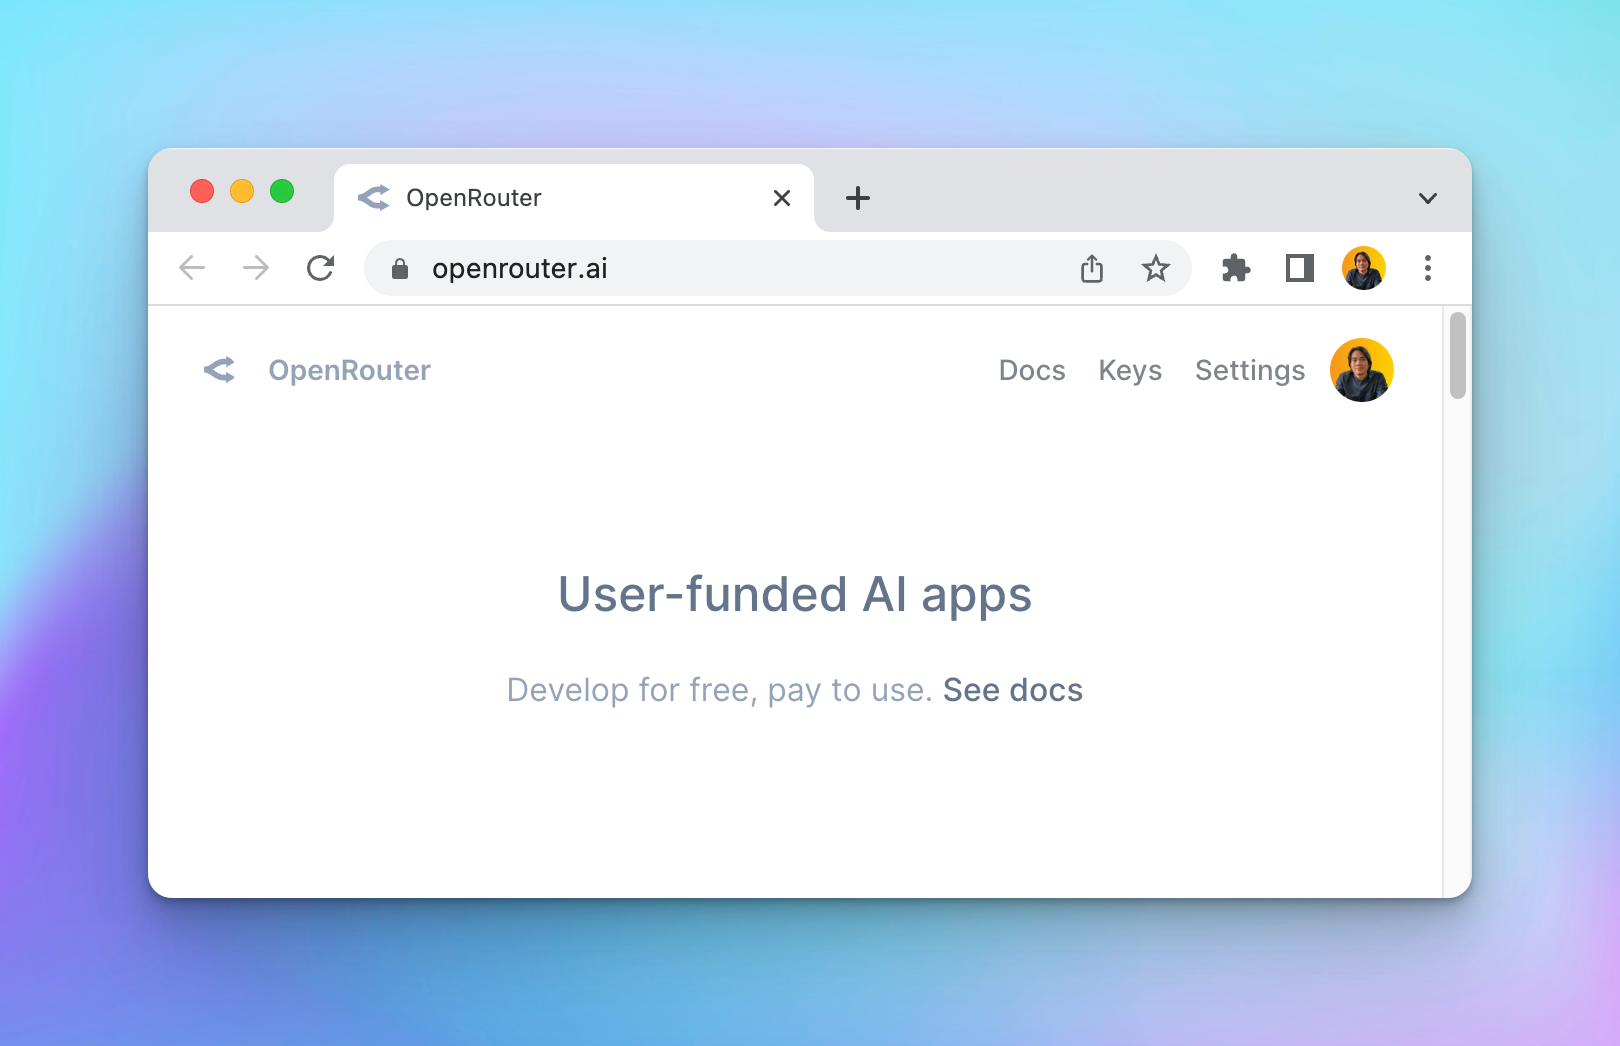
OpenRouter AI (openrouter.ai) is a new service that gives you access to LLM models that you normally won’t have access to (GPT-4 32K, Google PaLM, Anthropic, etc.)
Here is how to use Open Router models on Typing Mind.
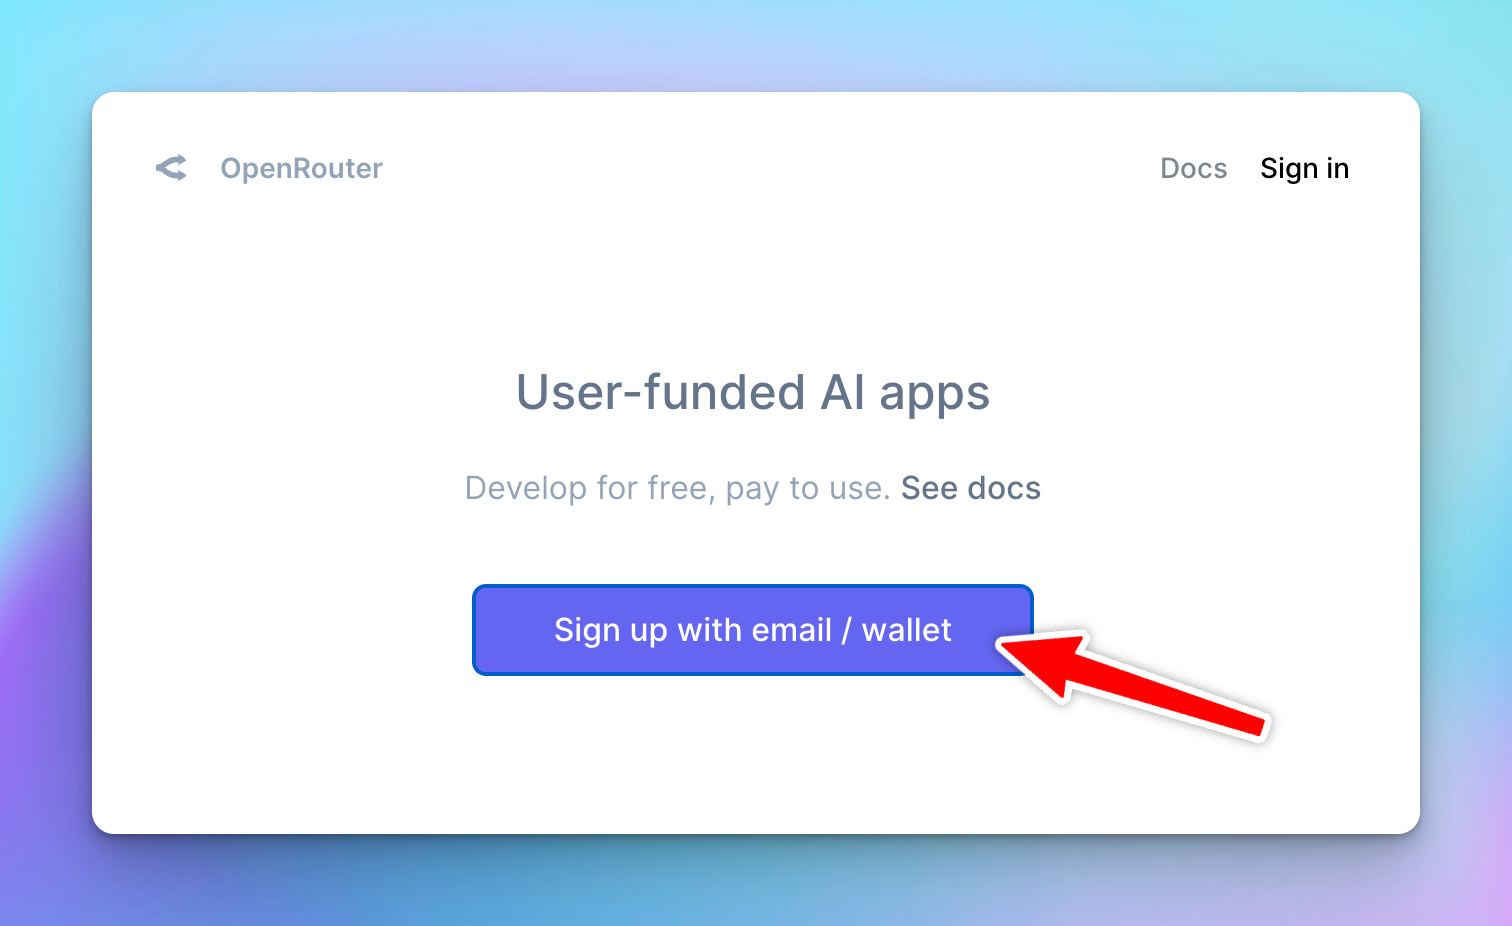
1. Create an account
Go to openrouter.ai and create an account. Open Router allows you to use some model for free, or you can buy more credits to use the premium models.
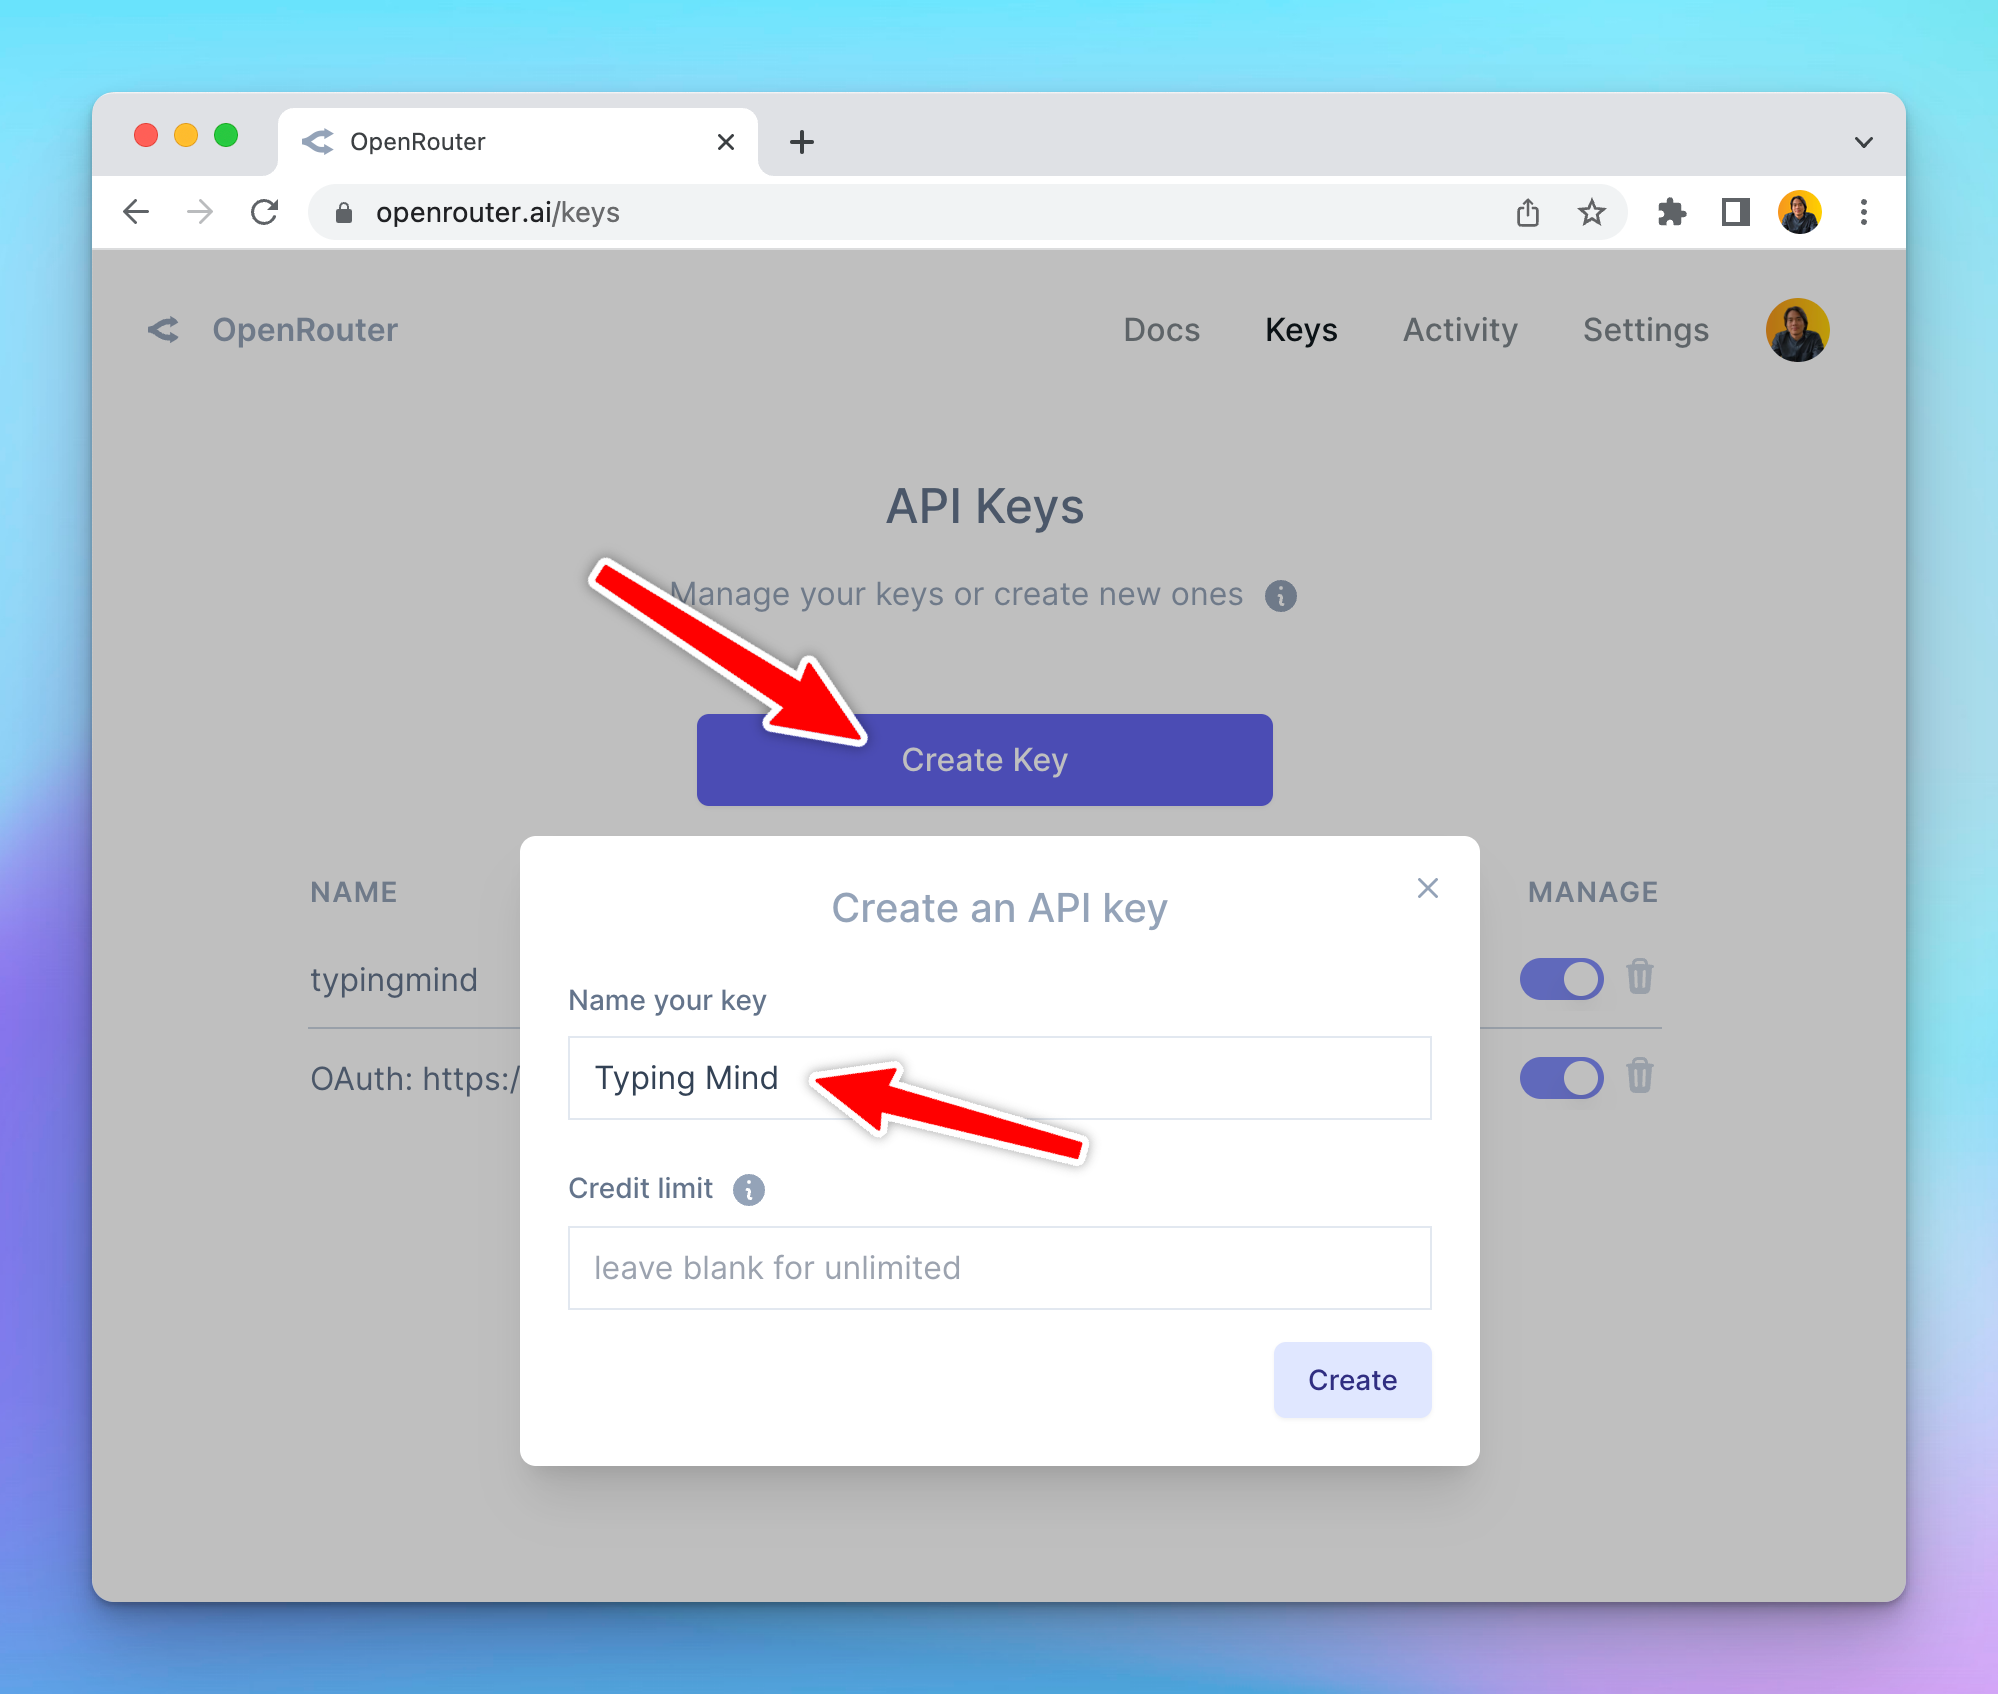
2. Create an API key
After signing up, go to https://openrouter.ai/keys to create an API key.
Enter “Typing Mind” to the name field. Leave the “Credit limit” empty to set the limit to unlimited.
3. Add Credits
Go to Account > Settings, scroll down to the credit section to Add Credits so you can use the generated API keys.

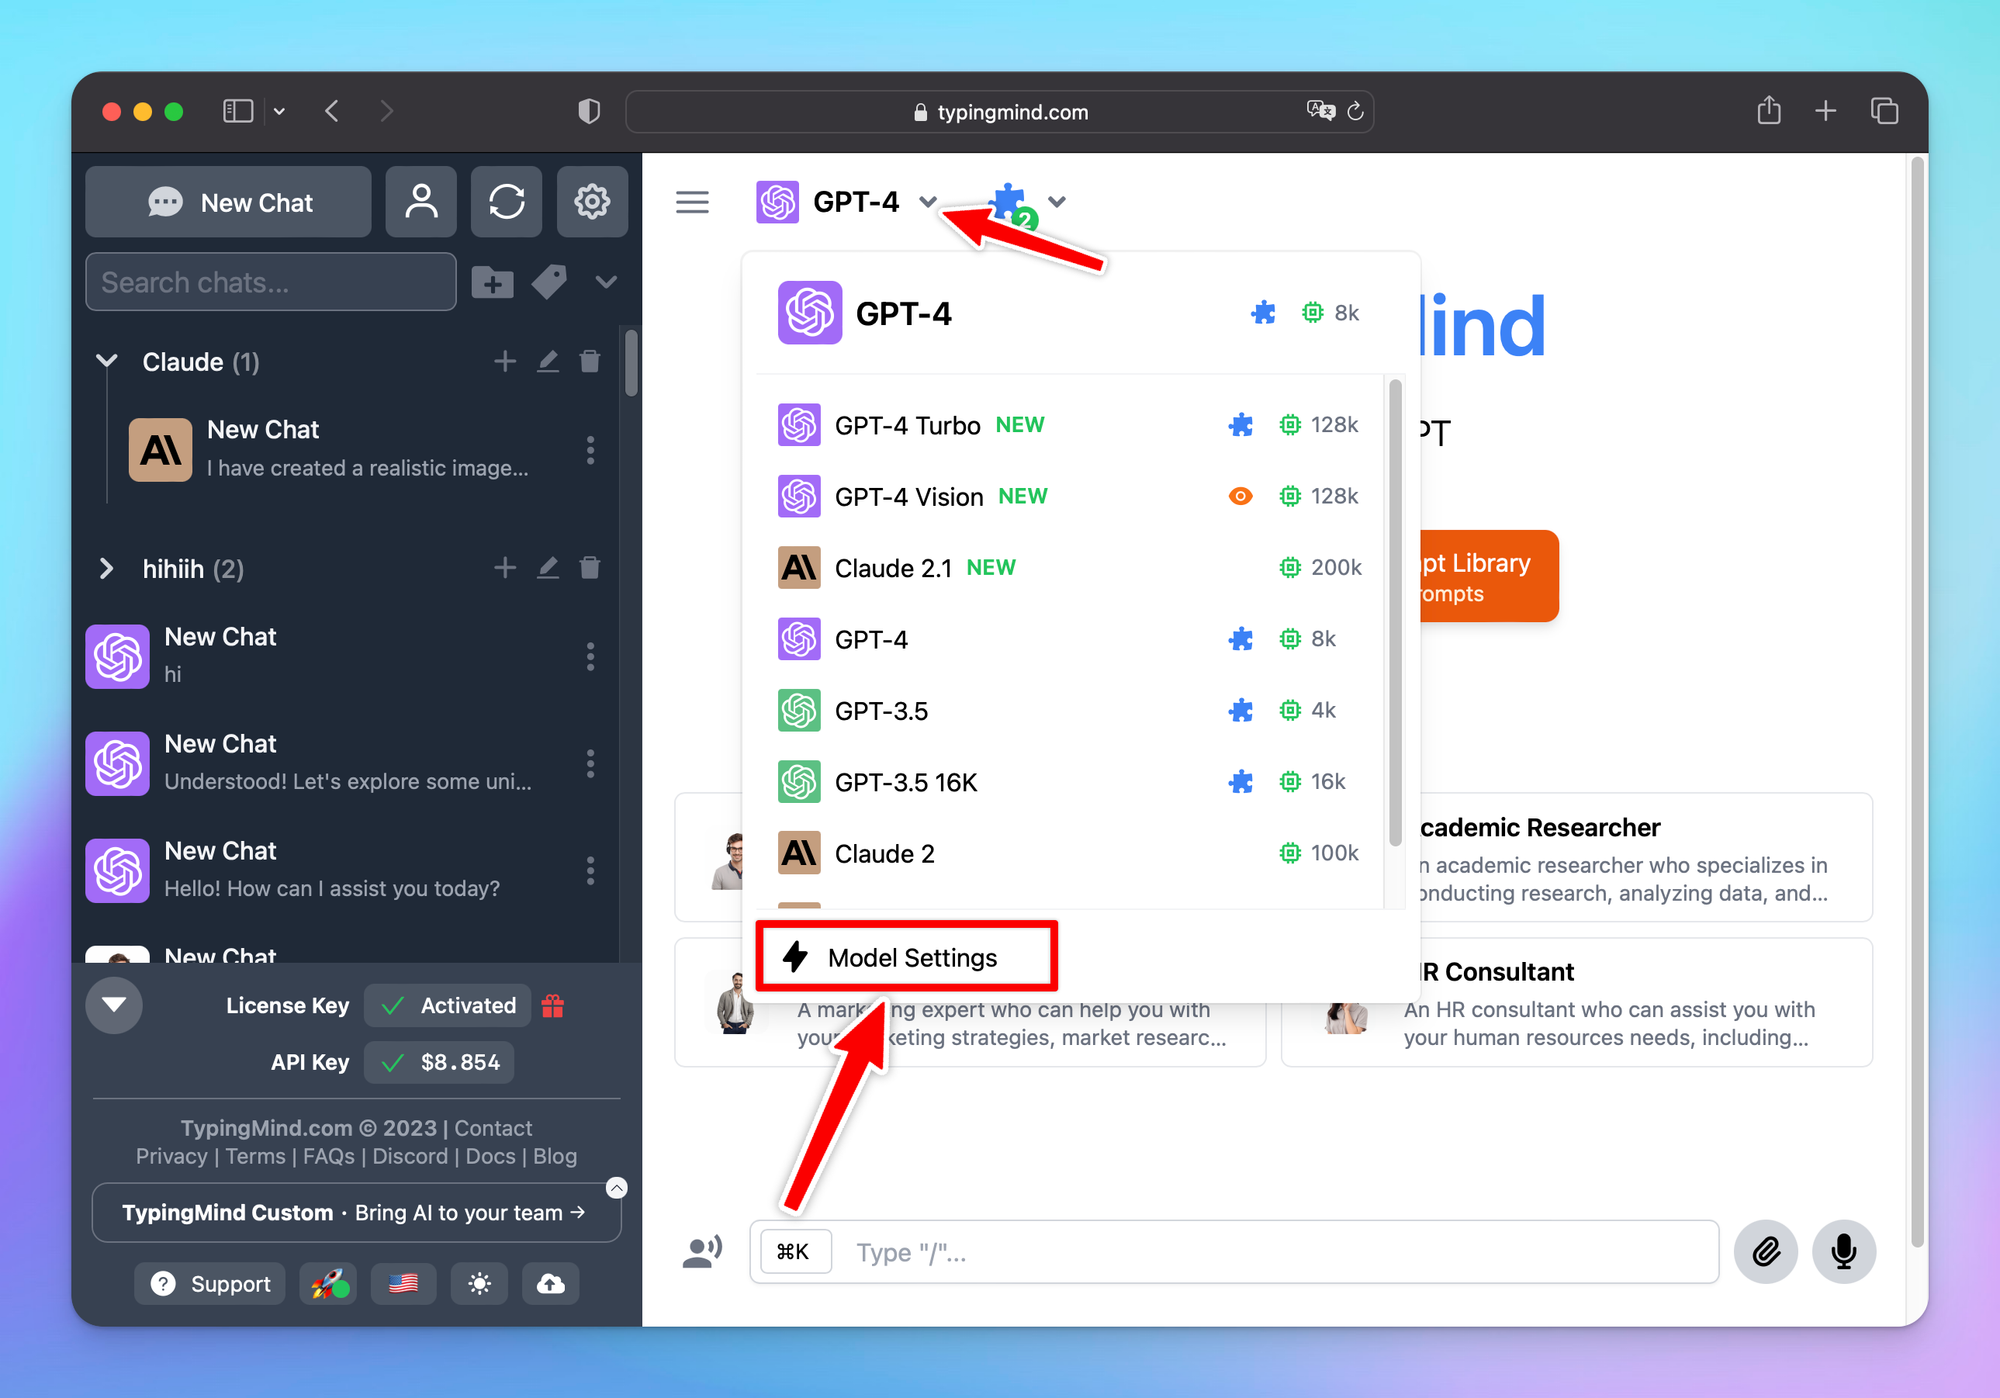
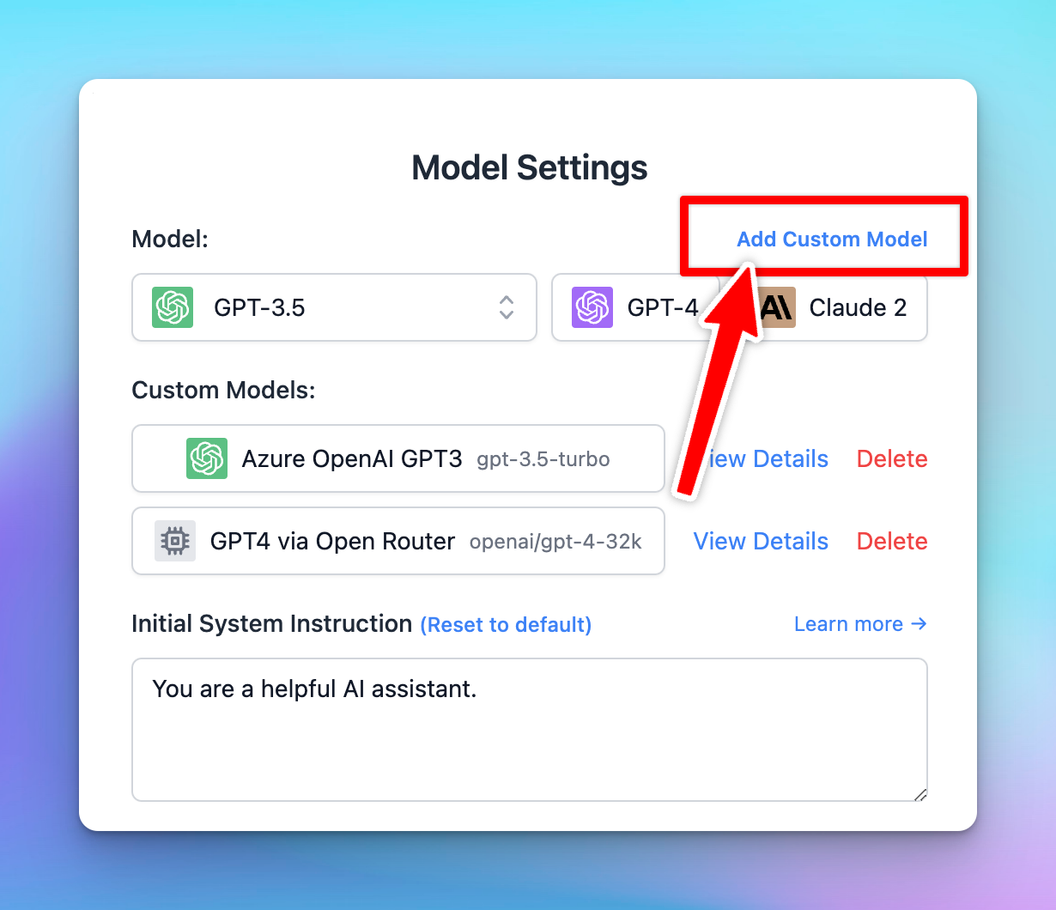
4. Add a custom model to Typing Mind
4.1. Direct import
Go to https://www.typingmind.com and click the Model Settings, then click “Add Custom Model”.
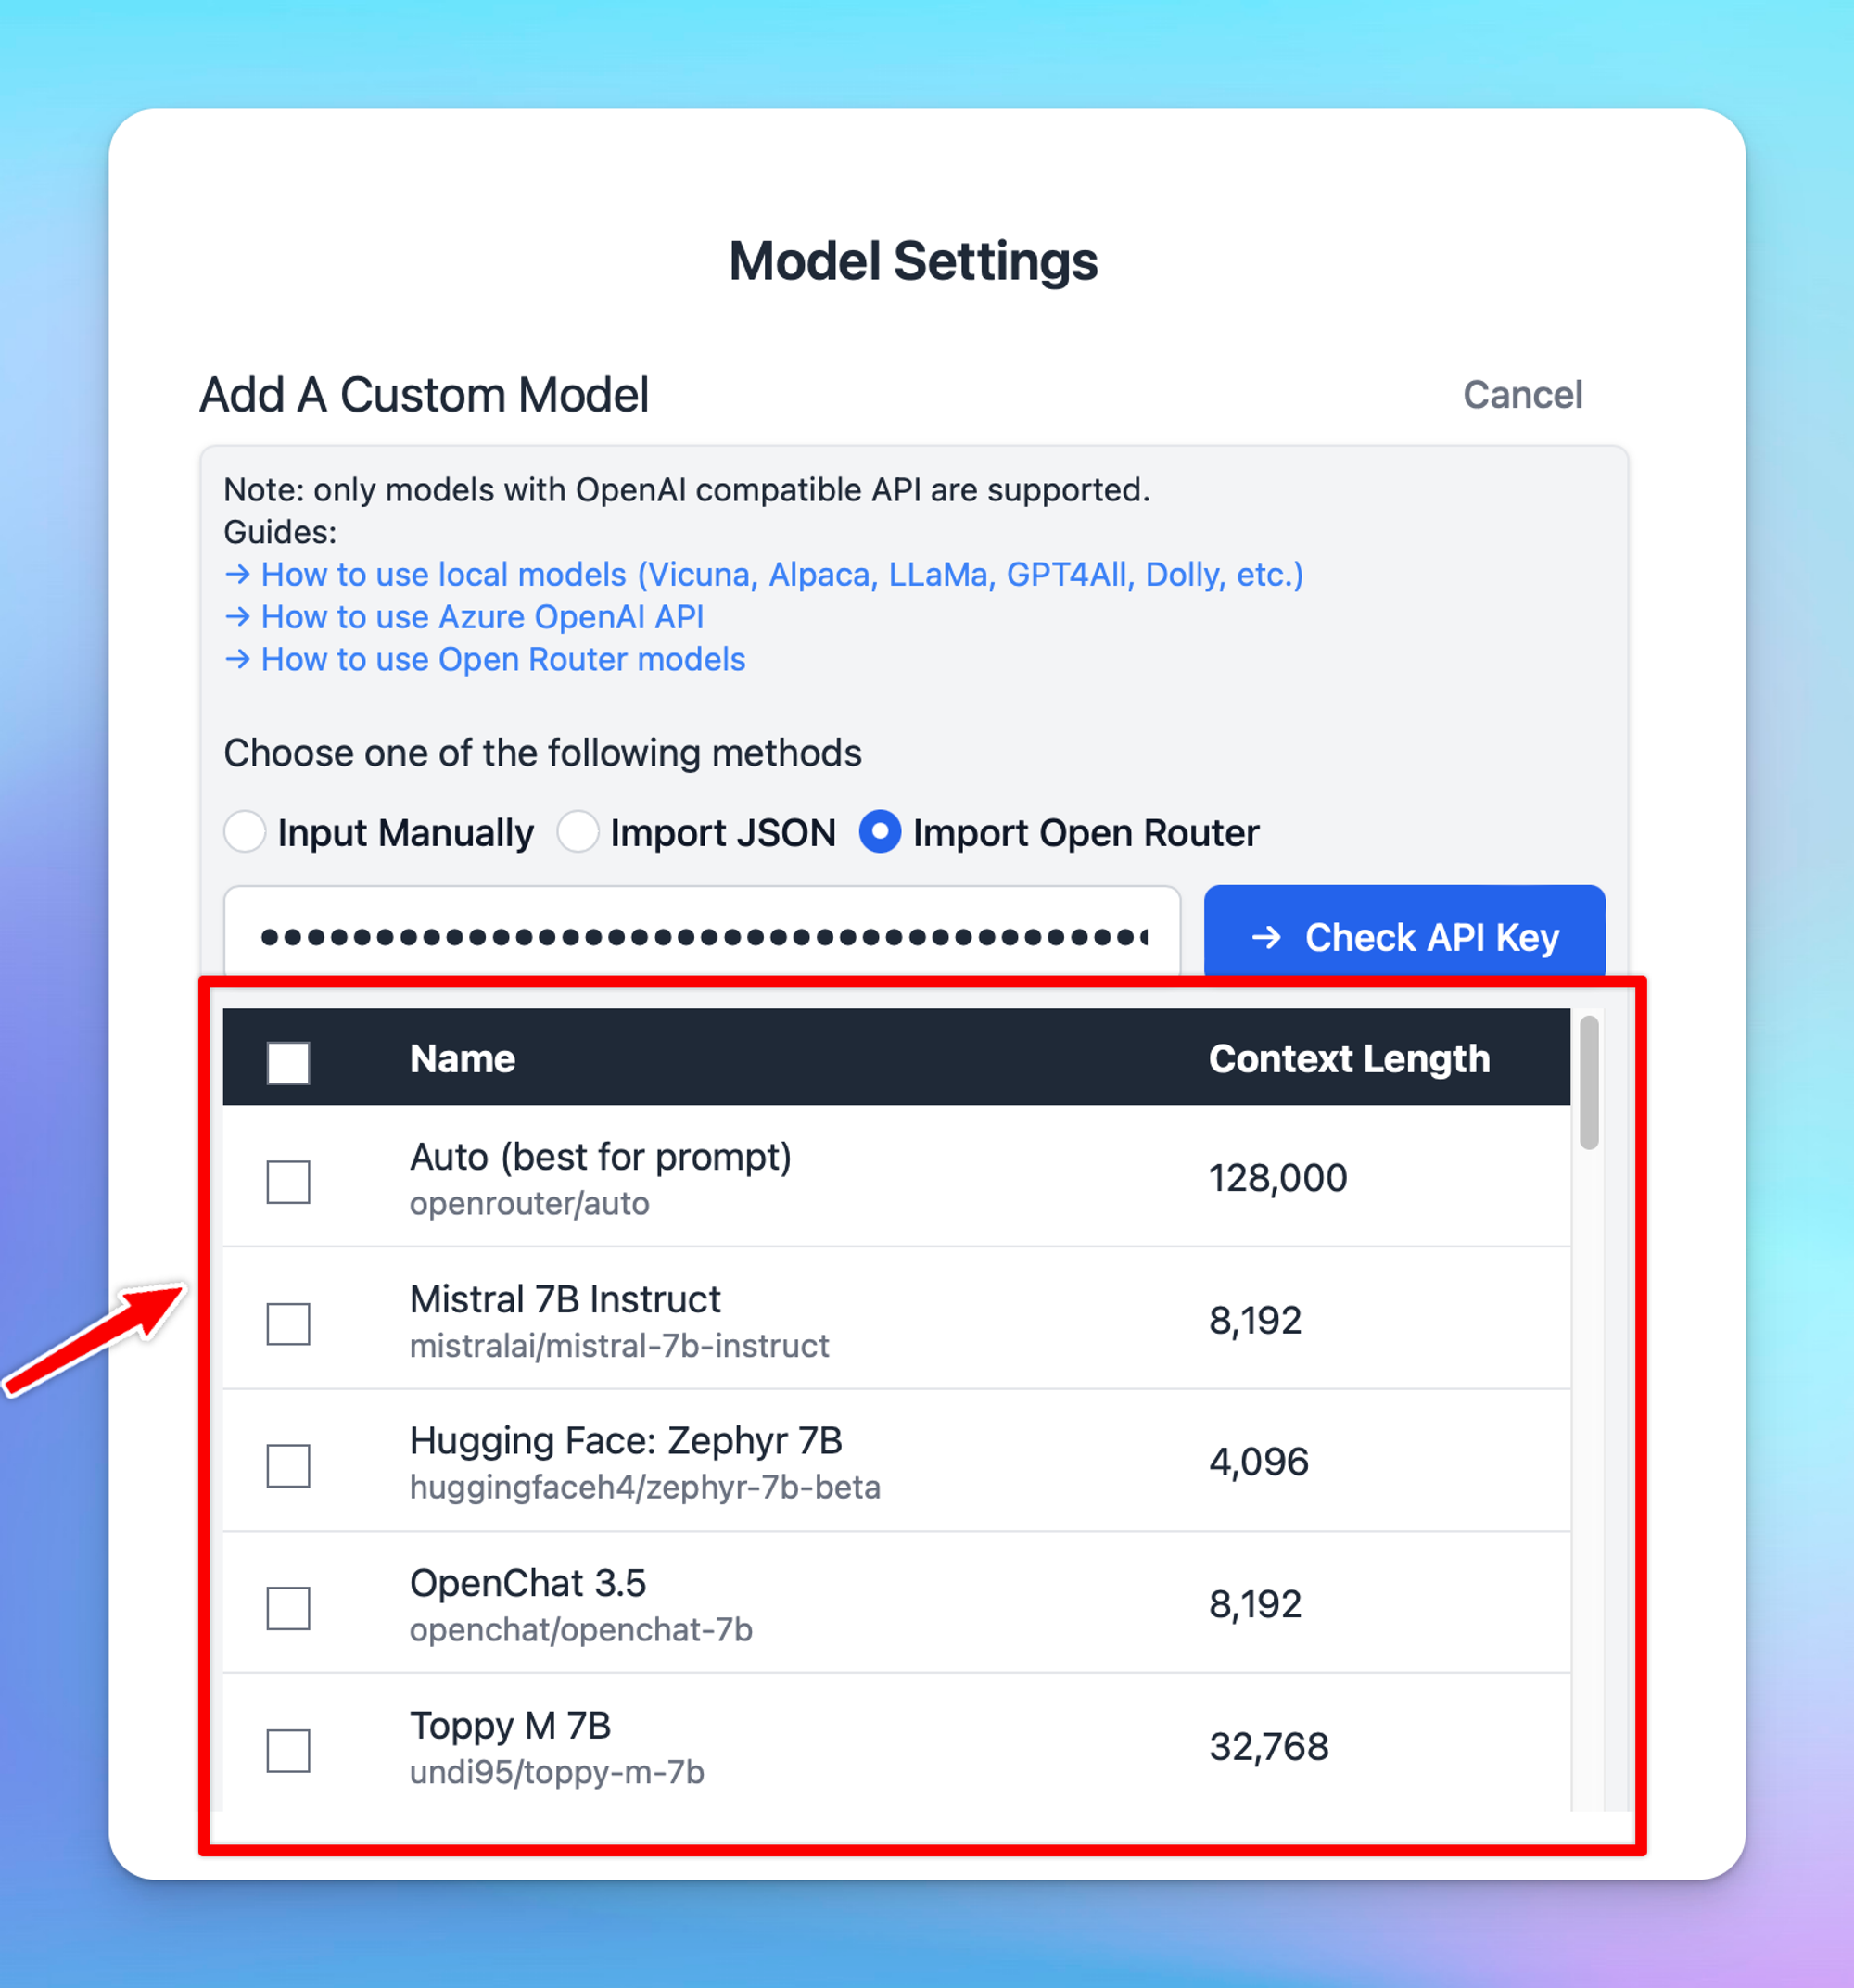
Choose “Import Open Router”, enter the generated API key at Step 2 and click “Check API Key”

A list of chat models will be shown up, you can pick one or multiple chat models at a time from the list.
4.2. Set up as a custom model
- Navigate the Manage Models menu
- Scroll down and click “Add Custom Model”

Enter the following information into the Custom Model form:
- Name:
GPT4 via Open Router(you can set any name you want) - Endpoint:
https://openrouter.ai/api/v1/chat/completions - Model ID:
openai/gpt-4-32k(change to your desire your model here, make sure the ID is exactly from Open Router model list) - Context Length: Enter the context length of your selected model (Open Router model list).
- Optionally, you can enable the “Support Plugins” toggle if the model you use support OpenAI Function Calling.
Click “Add Custom Headers” and add the following headers:
Authorization:Bearer {{your API key created on step 2}}X-Title:typingmind.comHTTP-Referer:https://www.typingmind.com
Here is what it looks like:
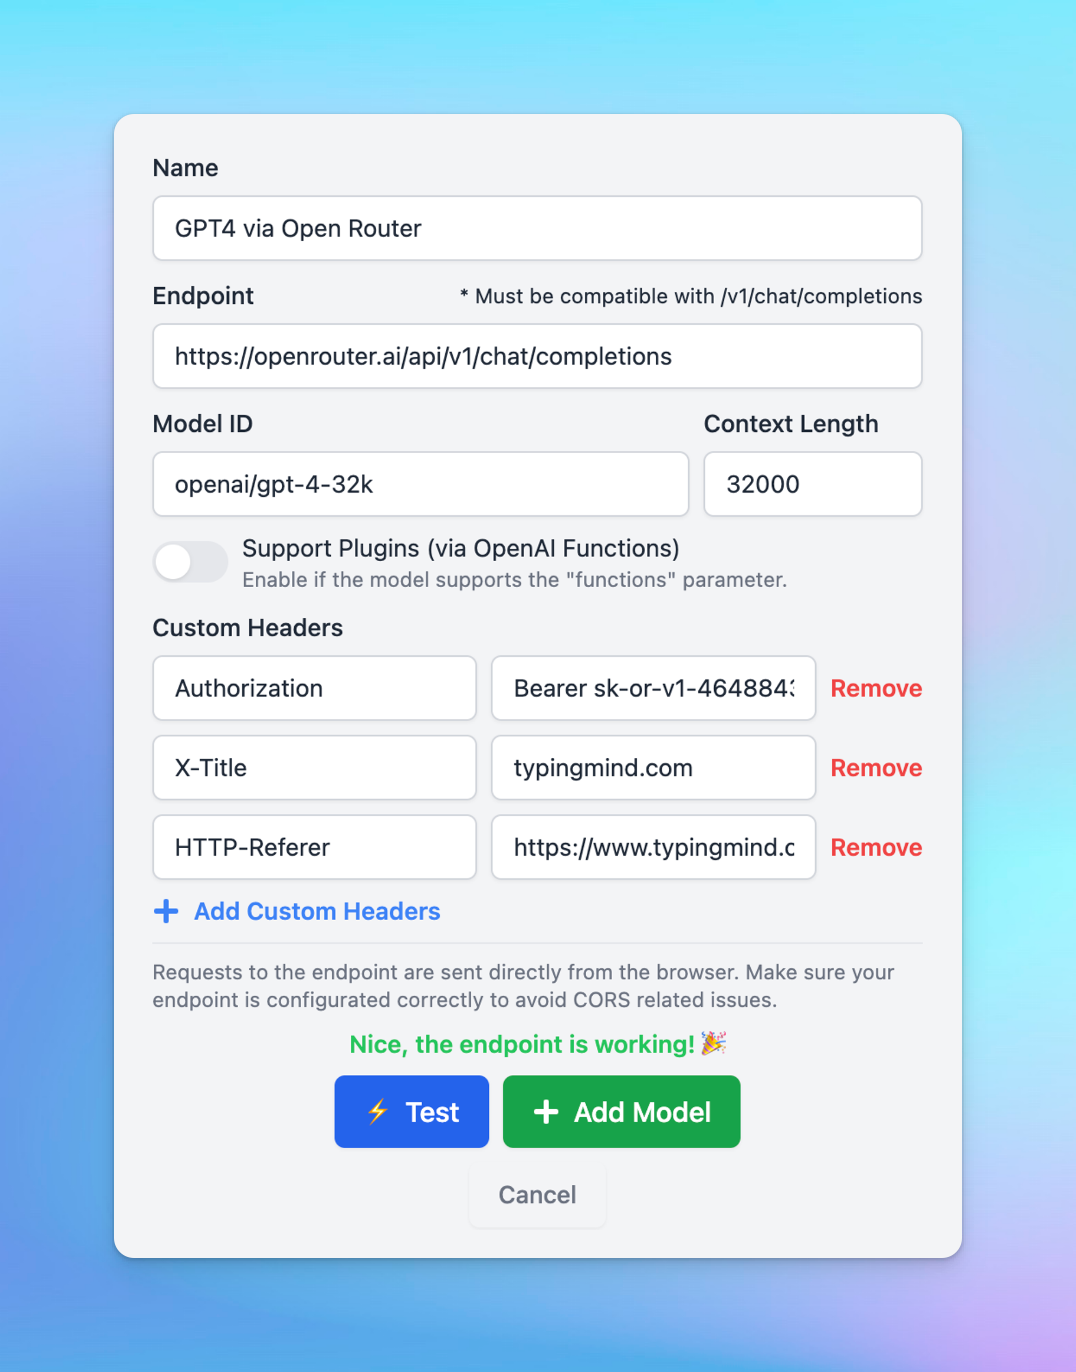
After filling all the fields, click “Test”.If everything works fine, you will see the message “Nice, the endpoint is working!”
Click “Add Model” to complete adding the custom model.
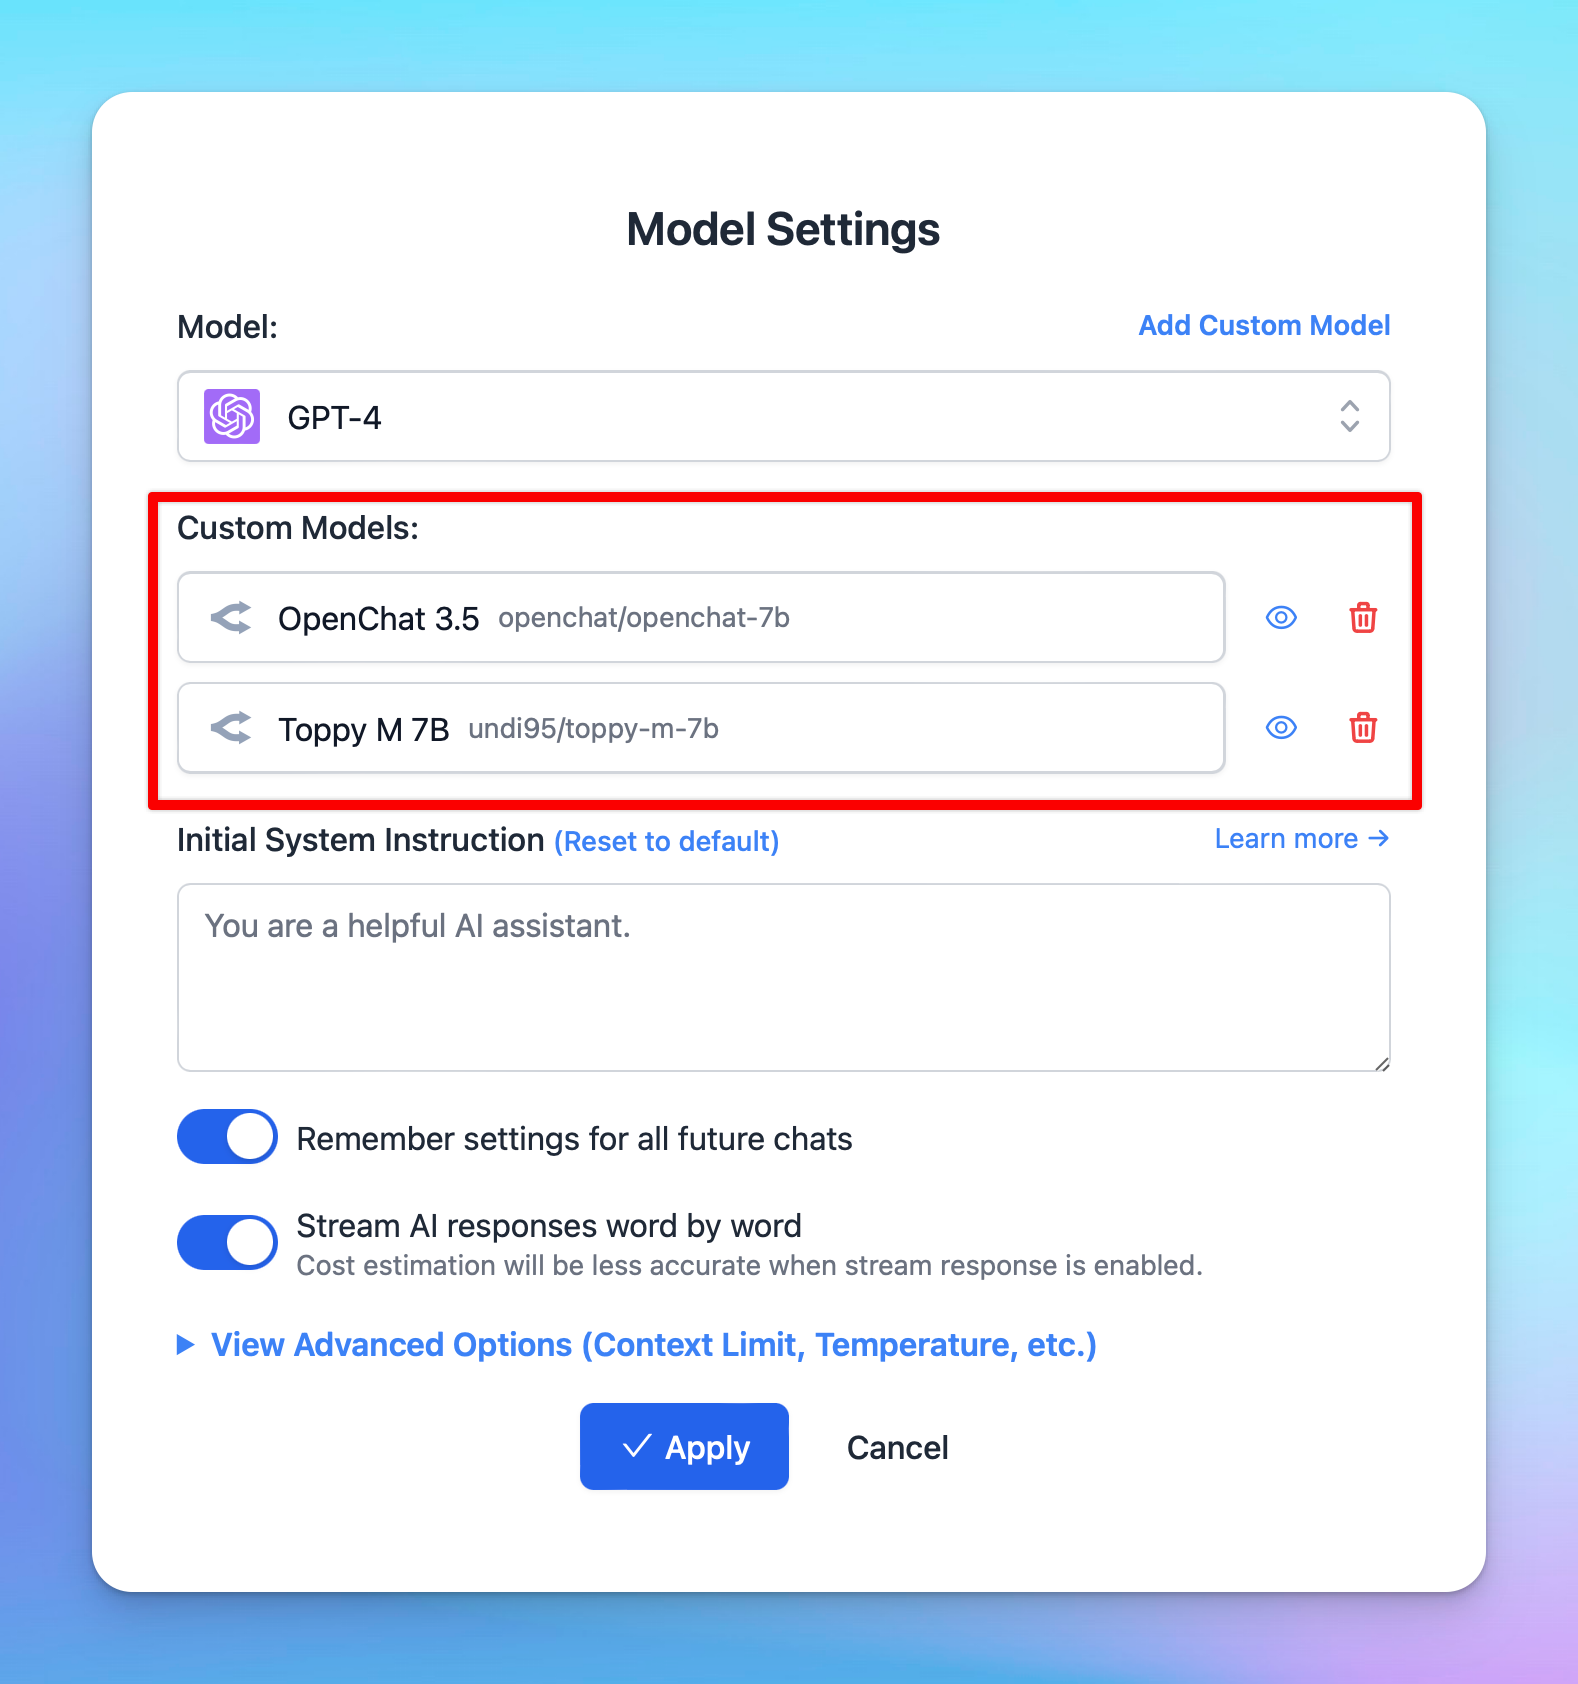
5. Use the model
Now you can select the newly added custom model and start chatting:
That’s all!
Happy chatting!


